adsense analytic

Showing posts with label Building Estimating. Show all posts

Tuesday, January 29, 2019

The details about bills of quantities

With the measurement of quantities, the total price can be evaluated more elaborately & precisely to give cost feedback on the job, that at the same time can be applied numerically in cost planning of other works.

Bills of quantities offer the best possible ways to manage the cost of variations in the contract. It is extensively utilized for various post-tender work like material scheduling; construction planning; cost analysis; and cost planning.

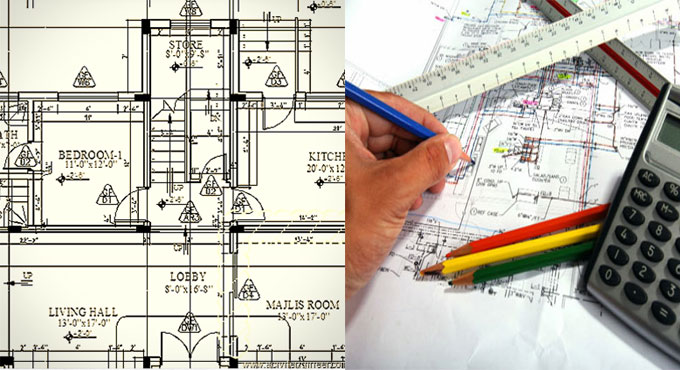
The method of working out the quantities prior to tender is a crucial test regarding what is drawn and stated can in fact be built. By examining the drawings and reviewing the construction in detail is definitely helpful in recognizing the issues which may be omitted initially.

The direct costs & indirect costs should be taken into consideration for determining the entire cost of the project which are included in various segments of the BOQ.

As the cost is identified prior to commencement of the construction, a superior level of price certainty is maintained for the construction project.

Facilitates to provide a low tender price.
Accommodates with design changes and assists the cost management process.
Provides superior quality of tender document.


Minimize the risk of contractors managing the information in the BQ for their own purposes.
Bypass the risks with regard to both time and cost since the projects are calculated on the basis of the overall floor area.
The valuation of progress payment becomes simple with detail information as given in BQ.


May pass up the tendency of contractor to build up a conspire group and bid high for projects.

Video Source: Civil Engineer

~~~~~~~~~~~~~~~~~~~~~~~~~
Published By
Rajib Dey
www.constructioncost.co
~~~~~~~~~~~~~~~~~~~~~~~~~

Wednesday, January 2, 2019

Types of Estimate found on various stages of a Project

Estimate is a raw calculation on quantities of various works and their expenses which are made by the experts of the proper field before a project gets complete. Accuracy of an estimate depends on the experience, ability and judgment power of the estimator.

An estimator has to be very careful about the quantity takeoff using the given data such as drawings, specifications and other documents about the project. Besides all of this, every estimate must be prepared with the consideration of other two factors which influence a project namely Direct & Indirect Cost. Direct Cost includes cost of materials, equipment, labor and subcontracted cost; while the Indirect cost includes overheads and contingency.

Types of estimate: There are seven types of estimates which are described below:

1. Approximate estimate: It is also known as budget, preliminary estimate which is prepared in the first stage of a project; this estimation is made to give a clear idea to the client about the amount of cost needed for the project and to get the acceptance from necessary approving bodies or banks to get the loan. So mainly the approximate estimate is calculated with relevant previous experience and the documents like project drawing plans, details about land, electricity & water supply and a full detailed report are necessary to make the estimate. So, Approximate estimate = rate of 1m2

2. Plinth Area estimate: This can be calculated by multiplying the values of length, width and area of plinth. The plinth area is considered as additional plinth area of the building at floor level which can also be known as the roof covered area of a building. The plinth area rate is originated by dividing the total cost of an early constructed building by plinth area of the earlier constructed building.

3. Cubic content estimate: It is done by multiplying the volume of the building by the unit cubic rate got form the earlier estimate.

4. Annual repair estimate and special repair estimate: These kinds of estimates are calculated for managing the constructed element in good condition. Special repair estimate is made in situations where the costs of materials increased when compare to annual repair estimate cost.

5. Revised estimate: This is made when the rate of earlier submitted estimate rises by 5% or more than that. There can be many reasons for the preparation of estimate as per the increase cost of materials while the reason and comparative statement between two estimates can be joined with the revised estimate.

6. Supplementary estimate: It is made when there is an important situation of supplementary work to progress out the original work.

7. Detailed estimate: This type of estimate is made with the help of complete set of contract data and the making of detailed estimate can do under two phrases like work out with quantities of different works and calculate the cost of each work. A detailed estimate must have some documents like report, specifications, drawings/plans, design charts and schedule of rates. Besides these there are many other factors that are needed to consider well in the time of planning the detailed estimate.

Article Source: www.basiccivilengineering.com

Types of Estimate found on various stages of a Project

~~~~~~~~~~~~~~~~~~~~~~~~
Published By
Rajib Dey
www.constructioncost.co
~~~~~~~~~~~~~~~~~~~~~~~~

Friday, December 28, 2018

Details about floor area and site coverage

Given below, the detail information on the floor area and site coverage which should be included in a floor plan.
Lot area: The entire square footage of a property.
Floor area : The entire square footage of a house. It is calculated to the exterior face of the building envelope along with 2nd storey covered balconies and trellises which expand in excess of 1.2 metres (m) from the exterior face of the building (covered section only).
Floor Area Ratio (F.A.R.): The figure is derived when the entire proposed floor area of all stories and attics of the principal building and all associate buildings is divided with the site area.
Floor area is equivalent to length x width for both floors that is calculated to the exterior face of the wall, whether a floor exists or not.
Different types of spaces like stairwells, elevator shafts, openings to the storey underneath are comprised in the floor area.
The following areas are not included in floor area measurement :-
Basement
The portions of the basement are partly or completely eliminated from F.A.R.:
    1. Any part of the basement that expands apart from the exterior walls of the storey over, along with crawl spaces, counts 100% in F.A.R calculations—none of this area are discarded.
    2. The floor area of basement is fully excluded from F.A.R. where the key floor elevation is 0.9m or less over the lower of natural or finished grade at the perimeter walls.
    3. To find out the basement area exemption, average natural and projected grades should be computed.
    4. Other parts of the basement are partly excluded from F.A.R., on the basis of the following calculation:
Lowest average grade – basement floor elevation /main floor elevation – basement floor elevation x 100
  1. This percentage should be multiplied with the total area of the basement to which this exclusion is employed to obtain the amount of area that is excluded from F.A.R. calculations.
  2. This calculation should be reiterated for each segment of the basement if floor elevation differs.
A Garage or Carport: Whether related to, isolated from, or portion of the principal dwelling to a maximum of 41m2 . When the garage remains in the basement, its area is excluded while measuring the basement area exemption.
An Accessory Building: For instance a tool shed or pool house, to a max of 22.5m2 , if situated 4.5m or more from principal building; max 4.6m2 is excluded if closer than 4.5m.
Decks and Porches: Exposed parts only. 2nd storey covered decks, expanding in excess of 1.2m from the exterior face of the building, are not excluded.
Attic space: Below 1.7m in height, calculated from the underneath of roof sheathing to the top of the ceiling joist or floor joist.
Crawl spaces: Under 1.8m in height (top of the ground to the underneath of floor joists over). Constructed Floor levels lifted for non-structural purposes cannot be taken into consideration for this exemption.
Unenclosed Landscape features: like open trellises, gazebos and patios.
Site coverage: The percentage figure derived when the total proposed area of all buildings and structures is divided with the site area.
For site coverage calculations, the following areas should be included :
  1. The principal dwelling, along with porches
  2. Exterior steps and decks which are included or more than 0.6m over grade
  3. The garage
  4. Enclosed, covered walkways
  5. Associate buildings or structures
  6. The pools over ground
Sourcewestvancouver.ca

Details about floor area and site coverage

~~~~~~~~~~~~~~~~~~~~~~~~
Published By
Rajib Dey
www.constructioncost.co
~~~~~~~~~~~~~~~~~~~~~~~~

Wednesday, December 26, 2018

Uses and advantages of digital theodolite in surveying & engineering works

In this exclusive civil engineering tutorial, you will learn the step-by-step guidelines for employing digital theodolite.

The surveyors extensively use this tool for conducting topographic survey. With this tool, it is possible to determine both the horizontal and vertical angle. By combining with stateo techniques, it can work out the horizontal distances as well as differential elevations. It is a useful tool for surveying and engineering work.

Theodolites apply caged graduated circles and angular readings are captured with an internal magnifying optical system.

The theodolite comprises of a telescope that can be moved within two perpendicular axes- the horizontal axis, and the vertical axis. The telescope is fixed and an electronic readout screen is applied to demonstrate horizontal and vertical angles. Digital theodolites are user-friendly since the digital readouts substitute the conventional graduated circles and produce more precise readings.

Instructions for use :-

Label the point at which the theodolite is going to installed with a surveyor’s nail or a stake. This point is considered as the base for calculating the angles and distances.

Arrange the tripod. The height of the tripod should be kept in such a way so that the instrument (the theodolite) remain in eye-level. The centrally placed hole of the mounting plate should remain over the nail or stake.

Push the tripod legs into the ground with the brackets on the sides of each leg.

Fix the theodolite by positioning it on top of the tripod, and screw it in exact position with the mounting knob.

Calculate the height among the ground and the instrument. It should be applied as a reference to other stations.

The theodolite should leveled by altering the tripod legs and employing the bulls-eye level. The slight tuning is done with the leveling knobs to secure t it just right.

Alter the small sight (the vertical plummet) available on the bottom of the theodolite. The vertical plummet facilitates you to perform and make sure the instrument is situated over the nail or stake. Modify the plummet with the knobs on the bottom.

Point the crosshairs in the main scope at the point to be calculated. With the help of the locking knobs on the side of the theodolite, retain it aimed on the point. Record the horizontal and vertical angles with the viewing scope available on the theodolite’s side.

Benefits of applying a Theodolite

Given below, various advantages of Theodolites:


  1. Superior correctness.
  2. Internal magnifying optical system.
  3. Reading circles is more accurate as compared to other instruments.
  4. Electronic readings.
  5. Horizontal circles are rapidly zeroed or arranged with any other value.
  6. Horizontal circle readings are captured either to the left or right of zero.
  7. Repeat readings are not required.
  8. Suitable for both flat and sloped ground.
  9. Not affected with wind or other weather factors.
Uses and advantages of digital theodolite in surveying & engineering works

~~~~~~~~~~~~~~~~~~~~~~~~
Published By
Rajib Dey
www.constructioncost.co
~~~~~~~~~~~~~~~~~~~~~~~~

Thursday, March 22, 2018

How to work the volume of concrete in a retaining wall

This construction video will provide some useful tips on computing the volume of concrete for retaining wall.

Retaining wall is defined as a rigid wall that is designed and constructed to withstand lateral pressure of liquid, earth filling, sand or other coarse materials which it is holding back.

Suppose, a retaining wall is segregated into two sections, section A is taken as base slab and section B is taken as the stem of retaining wall.

Therefore, the volume of retaining wall is determined with the following formula :-

Volume of retaining wall = Volume of base slab + Volume of Stem

Volume of base slab = length x breadth x height

= 10 x 3 x 0.2 (after converting 200 mm to meter) = 6m3

As the stem is a trapezoid, the following formula is used to calculate it’s volume :-

Volume of stem = [{a+b)/2} x h] x l

After putting the values, we get :-

= [{(0.5 + 0.2)/2} x 3] x 10 = 21m3

Therefore, total volume of retaining wall = 6 + 21 = 27m3

Therefore, the volume of concrete for the retaining wall = 27m3

If the retaining wall is segregated into three parts like part A, part B and part C. Part A is taken as the base slab, part B is taken as the stem and part C is taken as the counterfort of the retaining wall.

Therefore, the volume of retaining wall = Volume of base slab + volume of stem + volume of counterfort

= Volume of A + Volume of B + Volume of C

To learn the remaining calculation process, go through the following video tutorial.
Video Source: Nice engineering


~~~~~~~~~~~~~~~~~~~~~~~~
Published By
Rajib Dey
www.constructioncost.co
~~~~~~~~~~~~~~~~~~~~~~~~