adsense analytic

Friday, September 20, 2019

Some vital tips to control cracking with Reinforce Concrete Slab on Ground

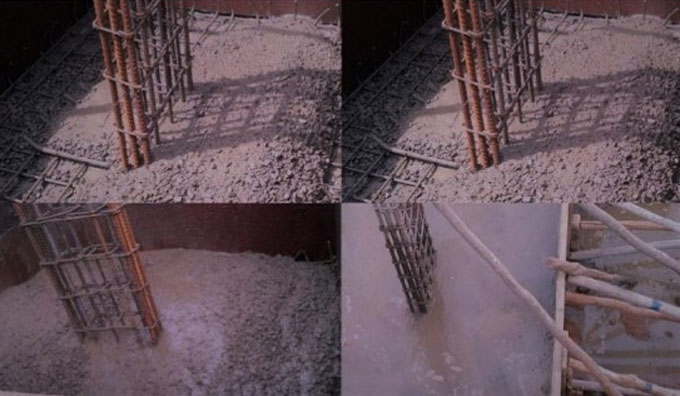
Steel reinforcing bars and welded wire reinforcement are used to check crack width in nonstructural slabs-on-ground.
Most slabs-on-ground are unreinforced or minimally reinforced for crack-width control. If steel reinforcement is arranged in the upper or top portion of the slab thickness, it restricts the widths of random cracks resulting from concrete shrinkage and temperature restraints, subbase settlement, applied loads or other issues. This type of reinforcement is normally defined as shrinkage and temperature reinforcement.
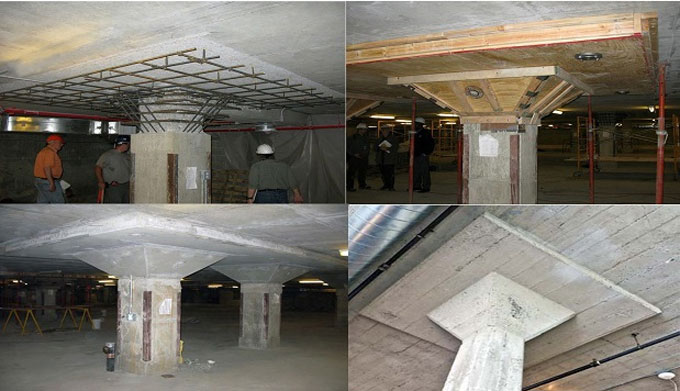
Shrinkage and temperature reinforcement is not same as structural reinforcement. Structural reinforcement is generally arranged in the bottom section of the slab thickness to enhance the load bearing strength of the slab. Most structural slabs-on-ground contain both top and bottom layers of reinforcement for managing crack-widths and improving load capacities. Due to constructability issues and costs regarding two layers of reinforcement, structural slabs-on-ground are not regularly used as nonstructural slabs.
The basics: Steel reinforcing bars and welded wire reinforcement can’t control cracking. Reinforcement mainly remains inoperative unless the concrete cracks. Once cracking happens, it gets activated and manages crack widths by limiting the expansion of crack.
When the slabs are provided on greater quality sub bases with uniform support and include low shrinkage concrete with joints perfectly installed at a gapping of 15 feet or less, reinforcement is normally is not required. Seemingly, there exist few random or out-of-joint cracking. In case of random cracks, they should remain moderately tight due to the restricted joint spacing and low concrete shrinkage thus future serviceability or maintenance issues will be reduced.
If slabs are arranged on difficult sub bases with risks of non-uniform support or comprise of medium to high shrinkage concrete or joint spacing surpassing 15 feet, then reinforcement should be provided to control the widths of cracks. Since crack widths expand and become about 35 mils (0.035 inches), the effectiveness of load transfer via aggregate interlock is reduced and differential vertical movements over cracks or slab "rocking" can happen.
Due to this, crack edges remain uncover and edge spalling takes place, particularly when the slab is uncovered to wheeled traffic and especially hard-wheeled lift trucks. As soon as spalling begins, crack widths at the surface get expanded and slab deterioration along cracks is raised considerably.
When contraction joints are inappropriate and not installed, shrinkage and temperature reinforcement is necessary. This design approach is sometimes called as continuously reinforced or joint-less slabs and produces several closely spaced (3 to 6 feet) fine cracks all through the slab.
Crack control options: Normally, the cracks in slabs-on-ground are controlled with the following ways -
1) check the location of cracking by installing contraction joints (does not control crack widths) or 2) Installation of reinforcement (does not control crack location).
With Option 1, we can know where to crack in the slab and widths of contraction joints or cracks in the joints are mostly managed by the joint spacing and concrete shrinkage. When joint spacings and concrete shrinkage are raised, joint widths also expand. Similar to cracks, when joint widths turn out to be about 35 mils, the effectiveness of the aggregate interlock to transmit loads and resist differential vertical movements across joints is considerably decreased. Because of this, several load-transfer devices like steel dowels, plates or continuous reinforcement through contraction joints are used to keep positive load transfer and control differential vertical movements across joints.
With Option 2, the slabs are allowed to crack indiscriminately but crack widths are controlled through steel reinforcing bars or welded wire reinforcement. Normally, contraction joints are not installed with this option rather cracking happens indiscriminately that develop several, tightly held together cracks.
Some vital tips to control cracking with Reinforce Concrete Slab on Ground

~~~~~~~~~~~~~~~~~~~~~~~~~~
Published By
Rajib Dey
www.constructioncost.co
~~~~~~~~~~~~~~~~~~~~~~~~~~

Thursday, September 19, 2019

Step by Step Guide to Hard Plaster a Brick Wall

After constructing a brick wall, we need to plaster it. This is to prevent water ingress into the brickwork since bricks absorb water from outside. Also, to make up the issues in underlying brickwork like plumb-outs, diagonal-outs, etc. And lastly, it also helps prepare a proper base for further painting works (Putty application, paint application, wall paper application, etc.)

Now let us look at the step by step process of applying a hard plaster on a brick wall

Preparing the wall – Remove any excess dust and dirt from the wall with the help of a paint brush. Lightly brush the bricks with water as it helps the plaster to stick. Lay drop sheets in front of the wall.
Prepare the plaster mix – Before you proceed any further put on your dust mask, safety glasses and protective gloves. Add water in your mixing bucket. Add three buckets of sand and half a bucket of cement and half a bucket of lime. Use a mixer to combine all the elements.
Scooping up the plaster – Put a corner of the hawk into the plaster and use a trowel to push the mix onto the hawk. Rest the trowel on the hawk, tilt the hawk back and scrape the plaster onto the trowel.
Apply the plaster on the wall – Start from the top and from the right, work up to the bottom and the left while applying the plaster. Spread the mortar evenly across the wall. Use the brick lines as a guide. Start at the bottom of a brick and spread the plaster upwards about two to three bricks. Continue until the entire wall is covered.
Screed the wall – After the plaster is dry to touch, screed the wall to remove excess plaster and give it a flat finish.
Check for level plaster – Hold the spirit level vertically against the wall to ensure flatness, rub spirit level in areas of uneven plaster to flatten it.
Screed the wall – Screed the areas you rubbed with spirit level.
Patch up the wall - After the last screed, there might be areas where the plaster is uneven or patchy. Use the trowel and hawk to apply plaster where it’s needed.
Screed the wall - Again screed to flatten after patching


Step by Step Guide to Hard Plaster a Brick Wall

~~~~~~~~~~~~~~~~~~~~~~~~
Published By
Rajib Dey
www.constructioncost.co
~~~~~~~~~~~~~~~~~~~~~~~~

Friday, August 30, 2019

Some common issue in building plumbing system

Plumbing installations play a vital role in buildings since these supply clean water to several types of plumbing fixtures and then send used water to the sewage system. Water should be delivered uninterruptedly and safeguarded from contagion, and drain pipes should have sufficient diameter and no obstructions.

In this article, you will be familiar with common plumbing issues and how to get rid of them.

Preferably, plumbing installations should be done in an optimal way from the project design stage since restructuring a defective system in an existing building becomes complicated because there are several pipes implanted in floors and walls.

1) Defective Venting in Plumbing Lines

When there is not sufficient venting, flow is obstructed and fails to take away used water from fixtures quickly. Under plumbing systems, vents should arrange proper air movement into the pipes, but devoid of allowing odors out. The venting design also combines stacks which are extended to the rooftop, making sure that odors are discharged without affecting anybody.

2) Backflow

Backflow comprises of water movement opposite to the proposed direction in a pipe. The backflow occurs for the following reasons:

• Back siphonage means a cutback in upstream pressure. As for instance, water supply pressure is reduced with an abrupt surge in consumption.
• Back pressure means a surge in downstream pressure. As for instance, in high-rise buildings, gravity drive the water back that is stored in the piping system and the supply pressure should be considerably high enough to overcome this effect.


Read more

Some common issue in building plumbing system

~~~~~~~~~~~~~~~~~~~~~~~~~~
Published By
Rajib Dey
www.constructioncost.co
~~~~~~~~~~~~~~~~~~~~~~~~~~

Guidelines for rebar detailing of RCC structures

Reinforcement Detailing or Rebar detailing is a detailed construction engineering process normally accomplished by the Rebar fabricators, structural engineering consultants or the contractors for generating ‘shop/placing’ drawings or shop drawings and bar bending schedule of steel reinforcement for construction. Architect/Engineers(A/E) produce ‘Design Drawings’ with the purpose of adding strengths with rebar size, spacing, location, and lap of steel.

Rebar Detailing is also known as Rebar scheduling, RC Detailing and Bar Bending schedule predation, RC Drafting, etc in different countries.

Objective of Rebar Detailing - The rebar detailing is done for the following purposes :

a) To produce an error-free Bar bending schedule, when fabricated should be accommodated in the concrete formwork devoid of any issue. The similar Bar Bending Schedule should be utilized for accounting and invoicing.

b) To develop a detailed Rebar placing drawing (known as Rebar Shop drawings). This Rebar placing drawing assists an Ironworker to place rebar perfectly in the site efficiently.

c) To allow the structural engineer to verify and approve when the structural design intent is precisely transformed into the Rebar Placing drawings and Bar bending schedules.

d) To perform a Rebar wastage analytics and minimize probable scrap existing in the Drawing level.

Standard Hooks: The term “standard hook” is defined as follow -

1. 180o bend together with an extension of minimum 4 bar diameters, but not below 65 mm at the free end of the bar.
2. 90o bend together with an extension of minimum 12 bar diameters at the free end of the bar.
3. For stirrup and tie anchorage.


For 16 mm φ bar and smaller, a 90o bend along with an extension of minimum 6 bar diameters at the free end of the bar,

Read more

Guidelines for rebar detailing of RCC structures
~~~~~~~~~~~~~~~~~~~~~~~~~~
Published By
Rajib Dey
www.constructioncost.co
~~~~~~~~~~~~~~~~~~~~~~~~~~

Thursday, August 29, 2019

Details of earthing system in building construction

In electricity supply systems, an earthing system or grounding system is circuitry that attaches the segments of the electric circuit with the ground and determines the electric potential of the conductors corresponding to the earth’s conductive surface.
Earthing System: Regulations for earthing system differ significantly between several segments of electric systems. Most low voltage systems attach one supply conductor to the earth (ground).
An earthing system is primarily applied for the following applications :-
1. To safeguard a structure from lighting strike, operating the lighting via the earthing system and into the ground rod in spite of moving through the structure.
2. It is a vital part of the safety system of mains electricity that resolves issues related to floating ground and sky voltage.
3. The most general ground plane for large monopole antenna and some other types of radio antenna.
Usages of earthing:
1. Safeguard human from lighting and earth fault situation.
2. Safeguard the premises from lighting and earth fault situation.
3. Offer low resistance and safe path for lighting and fault current.
4. All metallic enclosure and extraneous conductive parts remain at equipotential.
5. LV system earth
Functions of earthing:
1. Equipment earth – Path for fault current, reduce touch voltage, safeguard from electric shock.
2. Lighting earth – Low resistance path to disparate the current under lighting attack.
3. Telecom earth – Signal earth, minimize noise and interference, stable DC supply voltage and resist electric shock.
4. Computer earth – Minimize interference, retain supply voltage.
Two Classes Of Protection:
Class I protection – Application of barrier/insulation and connection of defending conductor to equipment metallic enclosure to give protection from electric shock.
Class II protection – Apart from basic insulation, supplementary layer of insulation should be provided to the enclosure. So, no irrelevant conductive part exists. The supplementary layer is not dependent on the basic insulation in order that under failing of basic insulation, it provides extra protection.
The following types of earthing are commonly found :-
a. Supply System – Neutral Earth
b. System Earth
c. Electrical Safety Earth
d. Lightning Earth
e. Generator Earth
f. Protection Earth (i.e. surge arrestor)
g. Telecom/computer earth
h. Shielding earth
i. Integrated earthing system (advocated)
j. Electrostatic earth (clean room/hospital)
Details of earthing system in building construction
~~~~~~~~~~~~~~~~~~~~~~~~~~
Published By
Rajib Dey
www.constructioncost.co
~~~~~~~~~~~~~~~~~~~~~~~~~~

Wednesday, August 28, 2019

Effect of segregation and bleeding on quality of concrete

Segregation in concrete: Segregation means the detachment of ingredients in concrete. In concrete, the following types of segregations mainly occur:-
1. Detachment of coarse aggregate from the concrete mixture,
2. Detachment of cement pastes from the concrete throughout its plastic phase.
3. Detachment of water from the concrete mix (Bleeding in concrete)
Concrete is formed by mixing cement, fine and coarse aggregates. In a standard quality concrete, is all the ingredients are grouped properly to develop a uniform mixture. Segregation in concrete is primarily occurred due to variations in specific gravities of the ingredients.
Specific gravity of Cement remains among 3.1-3.6g/cc, and for aggregate it remains among 2.6-2.7g/cc. Because of this variation, the aggregate is detached from the matrix and segregation in concrete occurred.
There are various other factors to create segregation in concrete :-
1. Moving concrete mixes for long distances.
2. Weak mix ratio, where adequate matrix does not exist to unite the aggregates.
3. When concrete falls from over 1m.
4. Vibrating concrete for a prolonged period.
Guidelines to reduce segregation in concrete:-
Segregation is managed properly with exact mix ratio.
Handling, placing, transporting, compacting and finishing of concrete in perfect manner.
With the addition of air entraining agents, admixtures and pozzolanic materials in the mix, the segregation is controlled to some extent.
Bleeding in concrete: Bleeding is a type of segregation in which existing water in the concrete mix is forced upwards owning to the settlement of cement and aggregate. Since specific gravity of water is low, the water may proceed upwards. Bleeding normally occurs in the wet mix of concrete.
Due to greater amount of water cement ratio, the bleeding is found in concrete. If the water-cement ratio is higher, the concrete becomes weak and as a result excessive bleeding happens.
The bleeding in concrete is not a cause of great concern when the rate of evaporation of water is identical to the rate of bleeding. Normal bleeding improves the workability of concrete.
When the concrete becomes completely plastic, bleeding is not injurious. However, concrete still remains in the plastic stage and it is subsidized and compacted in due course.
How bleeding impacts the stability of concrete :-
1. Since water is pushed upwards in bleeding, sometimes with this water, specific amount of cement proceeds together with water to the concrete surface. If the top surface is worked up with the trowel, the aggregate comes downward and cement paste is developed at the top surface and it is known as ‘Laitance in concrete.’ As Laitance is developed, the wearing strength of structure is reduced and the longevity of structure is hampered.
2. While directing to the top from bottom, water produces continuous channels. Because of these channels, concrete turns out to be porous and facilitates water to move, that develops water voids in the matrix and decreases the bond among aggregate and the cement paste.
3. If water is accumulated at the top surface of concrete, the surface finishing is deferred.
4. Concrete becomes porous and its consistency is affected.
5. Excessive bleeding results in rupturing the bond among the reinforcement and concrete.
Remedies to control the bleeding :-
1. Bleeding in concrete is managed with the inclusion of minimum water content in the concrete mix.
2. Allowing the application of air en-training admixtures in the mix.
3. By providing more cement in the mix.
Effect of segregation and bleeding on quality of concrete
~~~~~~~~~~~~~~~~~~~~~~~~~~
Published By
Rajib Dey
www.constructioncost.co
~~~~~~~~~~~~~~~~~~~~~~~~~~

Advantages & Disadvantages of Flat Slab

Normal process of design and construction is to support the slabs with beams and support the beams with column. It is known as beam-slab construction.
The beams help in minimizing the existing net clear ceiling height. Often, in warehouses, offices and public halls, the slabs are used as a substitute of beams and they are directly supported with columns. These types of slabs are known as flat slabs.
A flat slab stands for a one-way or two-way system with solidities in the slab at the columns and load bearing walls are known as ‘drop panels’ Drop panels function as T-beams over the supports. They raise the shear strength and the rigidity of the floor system against vertical loads, thus the economical span range becomes greater.
Normally, the height of drop panels remains about two times the height of slab. The plan dimensions of the drop panels are a minimum of 1/3 of the distance in the direction being considered, normally rounded to the nearest 100 mm.
Flat Slabs are useful for most of the construction and for irregular column layouts like floors having curved shapes and ramps etc.
Types of Flat Slab Construction - Following types of flat slabs are commonly used in construction:
1. Simple flat slab
2. Flat slab with drop panels
3. Flat slab with column heads
4. Flat slab with both drop panels and column heads
The major features of a flat slab floor are a flat soffit, simple formwork and smooth construction. The economical span ‘L’ of a reinforced concrete flat slab is roughly D x 28 for simply supported, D x 32 for an end span and D x 36 for an interior span. Pre-stressing the slab raises the economical span to D x 35, D x 40 and D x 45 respectively, where D stands for the depth of the slab without the drop panel.
Benefits and Drawbacks of Flat Slabs
Benefits:
• Easy formwork
• No beams—streamlining under-floor services outside the drops
• Least structural depth
• Normally, shear reinforcement is not necessary at the columns.
• Saving in the height of the building
• Construction time is reduced
• Application of prefabricated welded mesh
Drawbacks:
• Medium extents
• Normally not ideal for supporting brittle (masonry) partitions
• Drop panels may obstruct with larger mechanical ducting
• Vertical penetrations should circumvent area around columns
• For reinforced flat slabs, deflection at the middle strip becomes important.
Advantages & Disadvantages of Flat Slab
~~~~~~~~~~~~~~~~~~~~~~~~~~
Published By
Rajib Dey
www.constructioncost.co
~~~~~~~~~~~~~~~~~~~~~~~~~~